
<dependency>
	<groupId>com.alibaba.cloud</groupId>
	<artifactId>aliyun-oss-spring-boot-starter</artifactId>
	<version>${alioss.version}</version>
</dependency>
<dependency>
	<groupId>com.aliyun.oss</groupId>
	<artifactId>aliyun-sdk-oss</artifactId>
	<version>${sdk.oss.version}</version>
</dependency>
<alioss.version>1.0.0</alioss.version>
<sdk.oss.version>3.15.1</sdk.oss.version>
alibaba:
cloud:
accessKey: LTAI4GGgDAS4qGD2cajyz3Pr
secretKey: cJ4EsHWwy7FLLIAuVRKbVJQZEoJQ9a
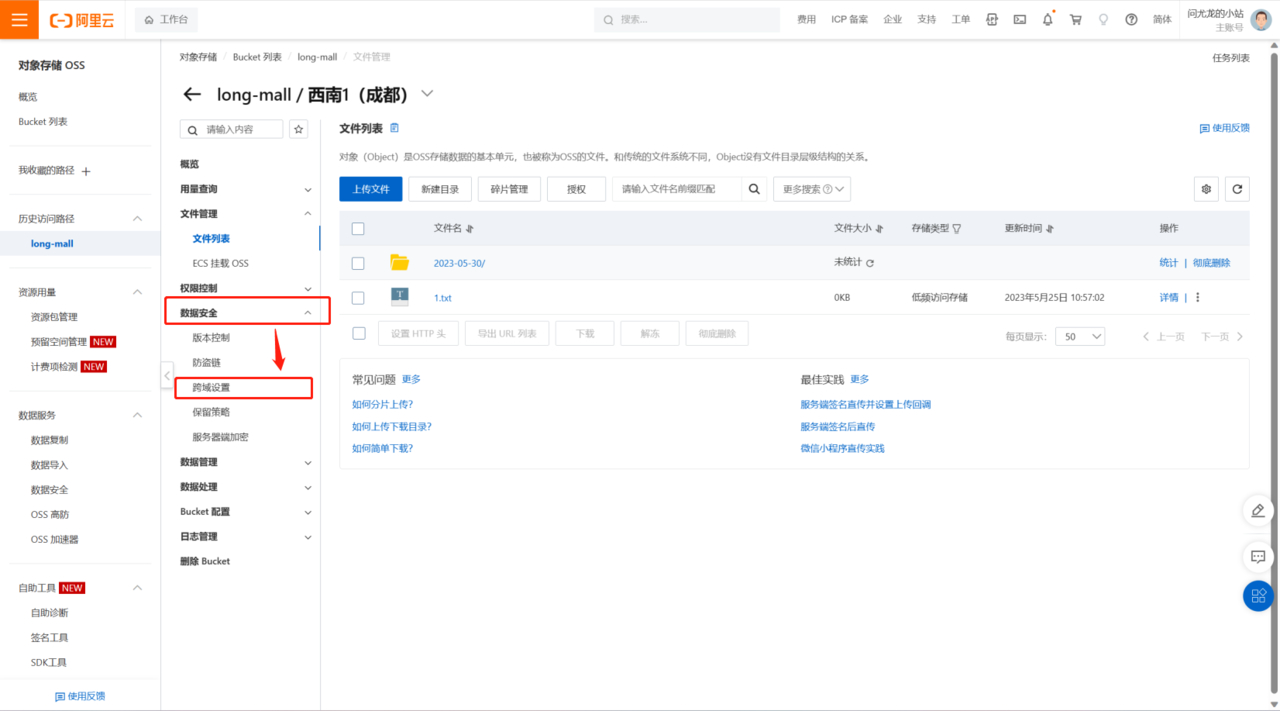
oss:
endpoint: oss-cn-chengdu.aliyuncs.com
bucketName: long-mall
OSS支持多种文件上传方式,我选择服务端签名后直传,后端返回一个签名给前端,前端带着这个签名,直接将文件上传至OSS,这样可以降低服务端压力,可以参考服务端签名后直传 (aliyun.com)
以下是我的后端代码:
host属性规则为http://+bucketName+"."+endpoint
dir就是文件上传至OSS时存储的目录,我按照日期生成目录,这样的话,在oss中存储的目录就会每天按照日期新建一个目录
import com.aliyun.oss.OSS;
import com.aliyun.oss.common.utils.BinaryUtil;
import com.aliyun.oss.model.MatchMode;
import com.aliyun.oss.model.PolicyConditions;
import com.mall.thirdparty.utils.R;
import org.springframework.beans.factory.annotation.Value;
import org.springframework.cloud.context.config.annotation.RefreshScope;
import org.springframework.web.bind.annotation.GetMapping;
import org.springframework.web.bind.annotation.RequestMapping;
import org.springframework.web.bind.annotation.RestController;

import javax.annotation.Resource;
import java.text.SimpleDateFormat;
import java.util.Date;
import java.util.LinkedHashMap;
import java.util.Map;

@RefreshScope
@RestController
@RequestMapping("/third-party/oss")
public class OssController {
    @Resource
    private OSS ossClient;

    @Value("${alibaba.cloud.oss.bucketName}")
    private String bucketName;
    @Value("${alibaba.cloud.oss.endpoint}")
    private String endpoint;
    @Value("${alibaba.cloud.accessKey}")
    private String accessId;

    @GetMapping("/getPolicy")
    public R getPolicy(){
        try {
            String host = "https://"+bucketName+"."+endpoint;
            String dir = new SimpleDateFormat("yyyy-MM-dd").format(new Date())+"/";
            long expireTime = 30;
            long expireEndTime = System.currentTimeMillis() + expireTime * 1000;
            Date expiration = new Date(expireEndTime);
            PolicyConditions policyConds = new PolicyConditions();
            policyConds.addConditionItem(PolicyConditions.COND_CONTENT_LENGTH_RANGE, 0, 1048576000);
            policyConds.addConditionItem(MatchMode.StartWith, PolicyConditions.COND_KEY, dir);

            String postPolicy = ossClient.generatePostPolicy(expiration, policyConds);
            byte[] binaryData = postPolicy.getBytes("utf-8");
            String encodedPolicy = BinaryUtil.toBase64String(binaryData);
            String postSignature = ossClient.calculatePostSignature(postPolicy);

            Map<String, String> respMap = new LinkedHashMap<String, String>();
            respMap.put("accessId", accessId);
            respMap.put("policy", encodedPolicy);
            respMap.put("signature", postSignature);
            respMap.put("dir", dir);
            respMap.put("host", host);
            respMap.put("expire", String.valueOf(expireEndTime / 1000));
            return R.ok().put("ossData",respMap);

        }catch (Exception e){
            e.printStackTrace();
        }
        return R.error(500,"获取oss签名异常");
    }
}
前端vue代码如下,代码中使用了element-ui的组件,请求部分替换为自己的,需要注意action字段,组成规则为http://+bucketName+"."+endpoint
<template>
  <div>
    <el-upload
      action="http://long-mall.oss-cn-chengdu.aliyuncs.com"
      :data="dataObj"
      list-type="picture"
      :multiple="false"
      :show-file-list="showFileList"
      :file-list="fileList"
      :before-upload="beforeUpload"
      :on-remove="handleRemove"
      :on-success="handleUploadSuccess"
      :on-preview="handlePreview">
      <el-button size="small" type="primary">点击上传</el-button>
      <div slot="tip" class="el-upload__tip">只能上传jpg/png文件,且不超过10MB</div>
    </el-upload>
    <el-dialog :visible.sync="dialogVisible">
      <img width="100%" :src="fileList[0].url" alt="">
    </el-dialog>
  </div>
</template>
<script>
import {policy} from './policy'
import { getUUID } from '@/utils'
export default {
  name: 'singleUpload',
  props: {
    value: String
  },
  computed: {
    imageUrl () {
      console.log(this.value)
      return this.value
    },
    imageName () {
      if (this.value != null && this.value !== '') {
        return this.value.substr(this.value.lastIndexOf('/') + 1)
      } else {
        return null
      }
    },
    fileList () {
      return [{
        name: this.imageName,
        url: this.imageUrl
      }]
    },
    showFileList: {
      get: function () {
        return this.value !== null && this.value !== '' && this.value !== undefined
      },
      set: function (newValue) {
      }
    }
  },
  data () {
    return {
      dataObj: {
        policy: '',
        signature: '',
        key: '',
        ossaccessKeyId: '',
        dir: '',
        host: ''
          // callback:'',
      },
      dialogVisible: false
    }
  },
  methods: {
    emitInput (val) {
      this.$emit('input', val)
    },
    handleRemove (file, fileList) {
      this.emitInput('')
    },
    handlePreview (file) {
      this.dialogVisible = true
    },
    beforeUpload (file) {
      let _self = this
      return new Promise((resolve, reject) => {
        policy().then(response => {
          _self.dataObj.policy = response.ossData.policy
          _self.dataObj.signature = response.ossData.signature
          _self.dataObj.ossaccessKeyId = response.ossData.accessId
          _self.dataObj.key = response.ossData.dir + getUUID() + file.name
          _self.dataObj.dir = response.ossData.dir
          _self.dataObj.host = response.ossData.host
          resolve(true)
        })
      })
    },
    handleUploadSuccess (res, file) {
      console.log('上传成功...')
      this.showFileList = true
      this.fileList.pop()
      this.fileList.push({name: file.name, url: this.dataObj.host + '/' + this.dataObj.key})
      this.emitInput(this.fileList[0].url)
    }
  }
}
</script>
<style>

</style>
alibaba:
  cloud:
    accessKey: 自己的accessKey
    secretKey: 自己的secretKey
    oss:
      endpoint: oss-cn-chengdu.aliyuncs.com
      bucketName: 自己创建的bucketName
accessKey和secretKey可以在这里查看

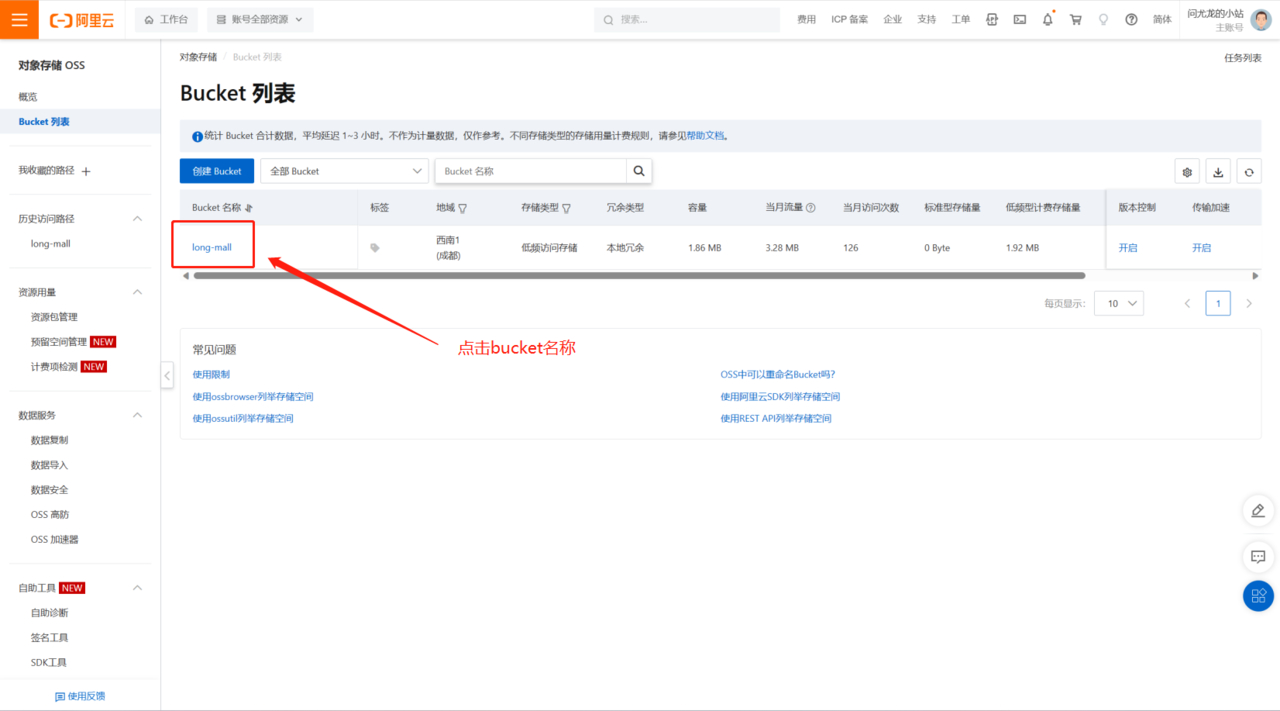
bucketName就是自己配置的bucket的名称
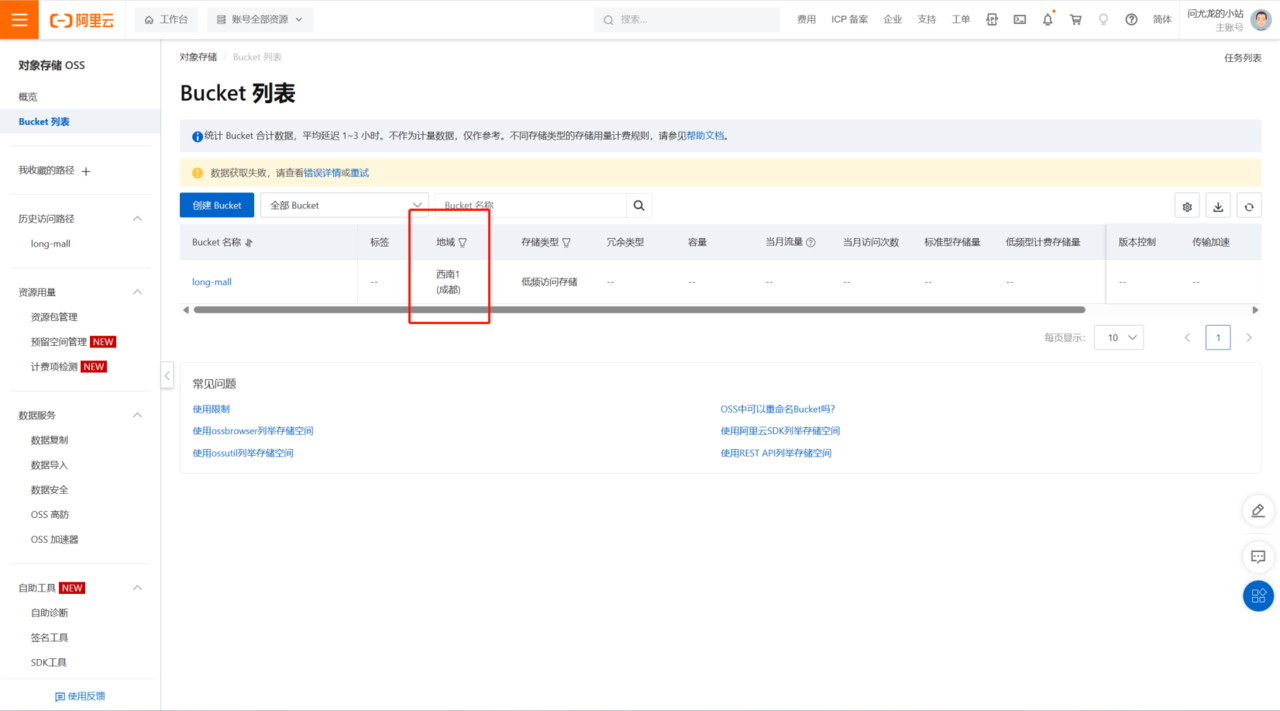
endpoint根据自己的OSS配置的区域选择对应的外网Endpoint即可,地域和endpoint对照参考访问域名和数据中心 (aliyun.com)
自己的区域在这里可以看到
 wenyl 的个人博客